Showing posts with label Cantonese. Show all posts

Saturday, September 11, 2010

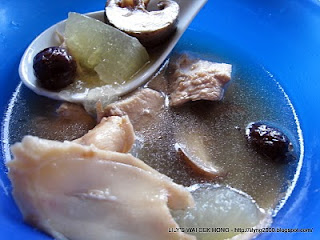
Chicken And Wood Ear Fungus Wine Soup

This dish is a confinement dish.  The chinese, especially the cantonese would cook this dish as a post-natal diet for the whole month of confinement after childbirth.  During pregnancy, a woman may feel bloated and feel like there is a lot of gas in the tummy. This is due to the softening of our body ligaments and etc to make way for the baby’s growth. To expel those gas from the stomach, one soothing food we can take is ginger but after childbirth, gas is bloating in abundance, ginger and more ginger in every dish will help, as food prepared with ginger develop a tendency to move outward.  The chinese do not encourage fresh fruits and vegetables, so ginger is the only source of fiber.  After delivery, the body is susceptible to 'cold' and must be kept warm, therefore wine is the best as it moves  upwards and pushes up the energy. Wood Ear Fungus helps to prevent various forms of bleeding and prevents blood clotting   All these practices are considered efficacious for curing the body's imbalance but especially as a preventive therapy against ailments in later years.  I, the renegade must remain cognizant and respectful of the indigenous beliefs and practices linking the events of reproduction and the health status of women.


Ingredients and Method


Recipe is the same as Chicken With Stone's Ginger Wine except peanuts are omitted, vegetable oil and glutinous rice wine were used instead of sesame oil and Stone's Ginger Wine.  This dish was cooked for my friends to enjoy the Home-brewed Glutinous Rice Wine. 
 
Serves

Saturday, August 21, 2010

Winter Melon Soup/Toong Kua Tong

This summer has been hot, so this is a common summer soup to relieve heatiness and cool down the body. My maternal grandma - Ah Poh is Cantonese, so drinking soup is important to my cantonese part in me.  My Ah Poh does not know how to even boil a pot of water, she had a 'Mui chai' who came along with her when she got married.  I later found out that  was why i had 2 'Tai Yee Mah' cos Ah Poh had considered her as her daughter.  Although Ah Poh did not know how to cook, she was an expert in criticising all foods served.  She had been branded with the saying - 'Hue Than mng hue cheong".  I remembered that she reminded my mother that a little piece of 'Tai Tau Choy' had to be added to Winter Melon Soup to enhance the flavor of the soup.  There are a variety of additions you can add to make this soup flavourful and unique and 'Tai Tau Choy' is a must for me.


Ingredients:

1 slice Winter melon (based on the diameter of 8″ and thickness 2″)
1 lb Pork ribs
8-10 pcs Red dates - pitted
5 or 6 dried shitake mushrroms - soak
1 piece  tai tau choy - soak and wash away the salt
3-5 pcs Dried oysters/dried scallops/dried octupus/dried squid - soak
Salt to taste

Method:

Put pork ribs in the pressure cooker and put in enough water to cover the ribs.  Bring it to the boil and conitinue to boil until all the scums rise to the surface.  Remove all the ribs and wash away all the scums.  Discard the water in the pressure cooker and wash preassure cooker really well.

Cut winter melon into small cubes of 1″ (remove seeds and skin)

Put cleaned ribs back to the pressure cooker together with the rest of the ingredients except the salt.  Put in the water that mushrooms and dried octupus were soaked.  Top up with more water until it is enough to cover the ingredients.  Close the lid of the pressure cooker and pressurized for 30 - 45 minutes, counting from the time the pressure cooker starts hissing.

Turn off heat when cooking time is over and let the pressure released by itself before opening the lid.

Taste the soup before adding salt as tai tau choy can be very salty.

Enjoy


Serves

Saturday, August 14, 2010

A Maize-ing Soup

Maize  was or is the term used  for Corn in the United Kingdom and Ireland and since Malaysia was colonised by the British, maize it was to me for the longest ever, until there came Sweet Corn in the Malaysian markets.  I did not realised that Maize and Corn are the same becauce the difference in taste and texture were totally different,  the maize was woody, starchy and it took a lot of mouth grinding to finish a cob, while the sweet corn needed no introduction espeicially when we are here in sweet corn Heaven.   In Chinese Medicine, corn and celery are used as a stomach tonic, carrot and tomato promote  digestion, lastly the humble potato heals inflammations and is used as an energy tonic.  With these goodness in a soup, what can go wrong? 


Ingredients:

2 ears of fresh corn - cut into 1 1/2 inch slices
3 large tomatoes - quartered
2 stalk celery - cut into 1 inch lengths
2 carrots - peeled and cut into 1 inch lengths
2 potatoes - peeled and cut into halfs
2 lbs pork spareribs/neck bones
Salt to taste


Method:

In the pressure cooker, put the pork bones in and enough water to cover the bones.  Bring to high boil and let boil until most of the scum is floating on top of the water.  Turn off heat and pour the contents through a colander.  Wash the bones thoroughly with cold tap water until all scums are removed. Wash the pressure cooker well, removing scum and fat that are stuck to the pot.

Put bones back into the clean pressure cooker and add in the corn, tomatoes and wai san with enough water the cover ingredients.  Make sure that the water level is not more than 2/3 full - pressure needs to be built with space.  Pressurized for 30 minutes and turn off heat, allowing the soup to continue to cook in the pressure.  Remove lid only when the pressure is totally off and add salt to taste.   If you are in a hurry for dinner, put pressure cooker under the tap and run the cold water over the lid of the pressure cooker,  this should bring the pressure down fast and you can soup on the table as soon as salt is added to taste.

Serves

Wednesday, July 28, 2010

Ginger Milk Curd

I have heard of this Ginger Milk Curd but did not have a chance to taste it until i managed to buy a ready mixed in the asian store here.  It was so easy to make, like making a cup of 3 in 1 coffee and i like the texture and taste very much.  In fact i love anything that has ginger.  Ginger has been my savior when digestion is concerned.  It has helped to rid of the huge bubble of gas build-up which has caused me alot of pain.  I decided to make this curd from scratch and after going through many recipes and know how from the net,  went ahead to make one bowl for myself.  At first, i doubted that it will set, how can just ginger juice and milk set? but it did.  The crucial part in this recipe is to have the milk in the correct temperature - 176f  - 165 f. This recipe is only for 1 small bowl, double or triple if you have to.

Ingredients:

150 ml whole milk
1 tbsp ginger juice
1 tsp sugar/sugar substitute


Method:


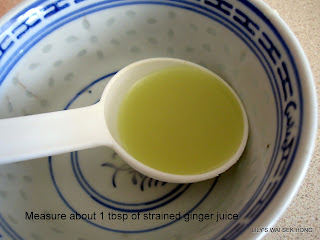
Grate ginger with a microplane grater and squeeze the juice through a strainer.  Measure 1 tbsp and leave in a small bowl.

Measure 150 ml of whole milk and add in 1 tsp of sugar or sugar substitute.

Microwave on high for 1 1/2 - 2 minutes to obtain the temperature of 176f - 186f.  Cooking time differs as microwave oven differs in wattage - know your microwave wattage.

Stir the ginger juice, then pour the hot milk into the ginger juice and allow it to set.  Curd should set in 10 minutes.  A spoon rested on top of curd will not sink, then you know that the curd has set.

ENJOY


Serves

Wednesday, June 16, 2010

Glutinious Rice Roll

Today is the 5th Day of the Fifth Moon following the Lunar Calender and today is the day of the 'Chung/Rice Dumpling Festival'.   I had wanted to make  some 'chung'  but due to unforeseen circumstances was not able to make some - excuses - excuses!!!  But...... since i do have leftover Law Mei Farn which is a very good filling for these Rolls.  These rolls are so much easier and faster to make and I am pleased that i have kept half the tradition by having glutinious rice served today but in another form.  You can follow any pau dough recipe or follow the one below.


 Ingredients:

Pau Dough:

2 cups pau flour(if all-purpose flour is used - add more water to make into a soft dough)
3/4 cup wheat starch
2 tsp baking powder
3/4 cup powdered/confectioner's sugar
1 1/2 tbsp shortening/lard
1 tsp instant yeast
2/3 cup water(adjust according)
1/4 tsp vinegar

Filling:

1/2 recipe of Law Mei Farn

Method:

To make pau dough:

Put flour, wheat starch, baking powder, powdered sugar and yeast in the food processor and pulse a few times to mix ingredients well..

Add in shortening/lard and pulse until well mixed.

Add vinegar to the water and pour into flour mixture with the food processor on,  Mix until a soft ball forms - water has to adjusted, adding more a little at a time, to make dough into a very soft and pliable dough.

Remove from food processor and knead until smooth, then leave to proof until double it's size.

To assemble:

Roll the 'law mei farn' into a 2 inch log.

Punch down the pau dough and roll into a rectangle that is big enough to wrap the law mei farn log.

Wrap the law mei farn log with the pau dough rectangle and pinch the seam well.

Cut the log into 1 1/2 inch pieces and put a piece of greaseproof paper underneath every piece. Leave rolls to proof again before steaming.  Pau dough should feel puffy and if touched lightly, the dough should not spring back and the dent remained)

Bring the water in the steamer to a very high boil and steam pau rolls for 8 - 10 minutes.

Serve hot

Serves

Sunday, June 13, 2010

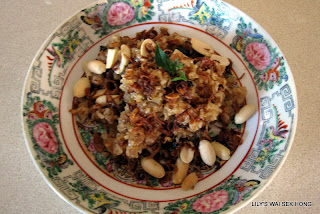
Law Mei Farn/Stir-Fried Glutinous Rice

This is a simplified version of the classic moulded dome of rice served in dum sum restaurants.  At the restaurants, this dish is usually steamed whilst at the home-front, the traditional method of cooking is adopted - stir-frying and it faintly resembles how Italian Risotto is cooked. This stir-frying method is tedious, 1/2 cup of water is added to the rice, stir and cover and cook in low fire to prevent burning.  Cook until the rice is moist but with no liquid.  I have used the microwave and this way i know i will not burn the bottom.    

Ingredients:

2 cups glutinious rice
8 cups of boiling hot water to scald the rice
3 tbsp lard/oil
1 1/4 cups stock
1 cup lap yoke/chinese bacon - diced small
1/2 cup lap cheong/chinese sausage - diced small
1/4 cup dried shrimp - soaked in hot water for 20 mins, drained before using
4 dried shitake mushrooms - soaked until soft and dice small
2 tbsp light soya sauce
1 tsp thick dark soya sauce
Pepper and sesame oil to taste
Chopped green onions, cilantro, fried shallots and roasted peanuts for garnishing.


Method:

Place rice in a large bowl and ladle hot boiling water over it until all the 8 cups of water is added.  Stir rice with a pair of chopsticks or wooden spoon and then drain.  Spread  the rice in a strainer in a thin layer, leaving a hole in the middle so as to fasilitate the draining better.  Place strainer over a bowl and let the rice drain for 30 - 45 minutes.

Heat wok with 1 tbsp lard/oil and fry the lap yoke until fragrant.  Dish out and leave aside.

Fry lap cheong until fragrant and dish out.  Leave aside.

Fry the dried shrimp until fragrant and dish out.  Leave aside.

Fry the shitake mushrooms and dish out.  leave aside.

Add 2 tbsp lard/oil and when oil is shimmering, add rice and stir to coat rice with the oil. 

Add in 1.2 cup of stock and transfer rice and stock to a big microwave-safe bowl, cover the bowl and microwave on high for 2 - 3 minutes. until the stock is absorbed.   Stir with a pair of chopsticks and add in another 1/2 cup of stock, cover and microwave on high for 2 - 3 minutes.  Repeat with the rest of the stock, cook and stir.

Add in all the fried lap yoke, lap cheong, dried shrimps and shitake mushrooms and mix well.  Cover and microwave for 5 minutes to finished cooking and the rice is cooked through.  If the rice is not thoroughly cooked add in more water/stock and cook further.

Top with green onions, cilantro, fried shallots, peanuts, a dash of pepper and sesame oil to taste..

Serve warm.


 Serves

Monday, May 31, 2010

Hong Kong Egg Tarts

I love Dim Sum and would love to go 'Yum Cha' which is our term for having a meal in the Dim Sum Restaurant, in any cities i visit.  Egg Tarts are one of the favorites to order.  The Egg Tarts served in most Dim Sum Restaurants are made with flaky pastry and they are so well baked with perfection, the pastry so light and flaky, the custard is smooth and sweet..  I have tried baking them but found it very challenging.  Have not been happy with my results and am still trying.  And, until i make some good flaky pastry egg tarts,  these Hong Kong  Egg Tarts which has shortcrust pastry, were accepted with glee by Renee,  she ate these in Hong Kong and loved them.


Ingredients:

Crust:

8 ozs all-purpose flour
2 ozs powdered/confectioner's sugar
a pinch of salt
4 1/2 ozs chilled butter - cut into 1/2 inch cubes
1 large egg, lightly beaten
1/4 tsp vanilla extract

Custard Filling:
3 large eggs
4 ozs fine granulated sugar (take away 1 tbsp for lesser sweetness)
225 ml  hot water
3 fl ozs evaporated milk
1/2 tsp vanilla extract
2 drops of yellow yolk food coloring


Method:
 
To Make The Crust:
 
Put all-purpose flour, powdered sugar and salt into the food processor and pulse to mix.
 
Add in chilled cubed butter and pulse until fine breadcrumb like.
 
Add vanilla extract to beaten egg and then add into flour mixture with the machine running and stop machine as soon as the dough is formed.  Do not overmixed.
 
Remove and wrap dough with plastic wrap and leave in the fridge for at least 30 minutes before using.
 
To Make the Filling:
 
Put sugar and water in a microwave-safe bowl and cook on high for 1 to 1/2 minutes and stir until sugar dissolves.
 
Add in evaporated milk, food coloring and vainlla, stir well.
 
Beat eggs lightly and add in to the above.
 
Pass through a very fine sieve, then fold a piece of kitchen towel into a strip and then run it over the top of the egg mixture to remove the bubbles.
 
Leave aside while you prepare the tarts.
 
To prepare the tarts:
 
Grease the tart moulds lightly.
 
Remove chilled dough, knead lightly and divide into small pieces(for my tart moulds, i use 3/4 oz).
 
Form dough into a tiny disk that will fit the base of the mould, then using the thumb, press dough so that it comes up the side of the mould.  Dough can be slightly higher than the mould but not too much - higher will allow more room for more filling but if too high, it will form a lip as this dough recipe is very soft.)
 
Repeat until all the tart moulds are formed.  Formed tart moulds can be kept in the fridge well wrapped until you need to bake them.
 
Preheat oven to 450 f and put the rack to the lowest rung of the oven.(Friends at sea-level can bake @ 400f)
 
Fill the formed tart moulds with egg filling to slightly lower than the rim, do not overfill.
 
Bake @ 450f for 10 mins and then lower the lower the heat to 400 f(sea-level @ 375 f) for another 15 minutes.  Baking time differs from the size of the tart moulds, so visual monitoring is important.  The crust has to be browned and the custard should not be overcooked.  The custard will puff slightly - yes slightly, then it is a sign for doneness,  you might have to remove some of the tarts which will cook faster than the rest as there are hot spots in most oven.  If  the custard puffs up and the crust is not brown enough, the oven door can be opened and left ajar for a while to lower the temperature in the oven, then it can be closed to finish the baking) 
 
Good luck and enjoy.
 
 
Serves

Saturday, May 15, 2010

Steamed Ground Pork With Cuttlefish/Yau Yee Cheng Gee Yoke

Before i proceed further with this text, i would like to apologise for my absence and would like to thank all the well wishes and prayers for my mom.  My Mom is now resting in peace and my daughter and me are glad that we get to spend a few days with her before she passed on.  My Mom was such a considerate person and she had never ever wanted to 'mah fan' her children especially me.  She must have wanted me to know that she is now in peace.  Thank you Mom for being such a lovely mother and bringing us up to be meaningful human beings, may you rest in peace.  I would like to thank all my siblings, their better half and children, and relatives who came from far and near and giving me an opportunity to connect to you all. Although we may be thousand of miles away, you all are always in my thoughts and have a special place in my heart.

This dish is one of the dish that my mom would cook and i would like to share this simple and yet so delicious served with white rice.  In the good old days before meat grinder or food processor, my mom would chop the pork with her cleaver, the one and only knife in the kitchen. Somehow pork chopped with a chinese cleaver tasted so much better when steamed, perhaps it is the love put in.


Ingredients:

1/2 lb/8 ozs ground pork
1 piece of cuttlefish(tieu pean) - washed, soaked until soft and then shred.
2 tbsp light soya sauce
1/2 tsp sugar
1 tbsp tapioca starch/cornstarch
1/4 tsp ground pepper
1 tsp sesame oil
2 - 3 slices of ginger - shredded

Method:

Mix all the ingredients in  ceramic dish/plate which can fit in your rice cooker and put the shredded ginger on top.. Alternatively, you can use a regular steamer or a wok to steam this dish.

Put in this prepared dish on top of the rice when the rice is  not cooked totally and the rice cooker's cooked function is not done. You must put this dish in time so that the residue heat from the rice will cook the pork.

Remove from rice cooker and serve hot.

Serves

Saturday, April 3, 2010

Hum Cheem Paeng With Red Bean Filling

I have not make this snack for a long time and when my dear friend, Nellie, wanted to make some, i had to pull up  the Hum Cheem Paeng II recipe to refresh my memory of how the recipe goes, it has been awhile ago and i did not remember that vinegar was used for the starter instead of yeast.  It was a lengthy process - 2 days but it was worth it. It must be the presence of vinegar which made the starter more acidic and  made the baking soda very happy and that made me happy too, a good puffy cake. The red bean paste filling is a perfect match for this cake, it was so good that they were hijacked - I wanted one for breakfast but found the whole bag was missing.  I made some "kap chung"  with the same dough and will post the method soon.


Ingredients:

1 Hum Cheem Paeng II recipe

1 Red Bean Paste recipe Sesame seeds
Oil for deep frying


Method:

Make the dough folowing Hum Cheem Paeng II and when dough is ready for adding the salt and 5 spice, just sprinkle these two into the dough, then divide into portions of your choice.

Roll portions out into a circle and put a tsp of red bean paste in the center and wrap dough up sealing the edges well.  Leave aside.

Repeat until all the portions are done.

Heat oil for deep-frying until 325f.

Roll out the first filled portion thinly and finish rolling the rest of the portions.

Wet the center of portions with a little water and press in some sesame seeds

Lower 2 - 3 pieces(do not crowd the pan) into oil and as soon as the dough rises up to the top, flip it over.  Try and flip as often as possible, this will enhance the puffiness.  Fry until golden brown.

Remove and drain on rack and then on kitchen towel.


Serves